English
Deep Spiral
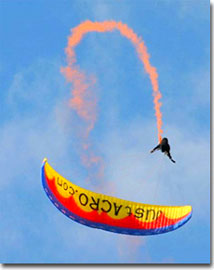
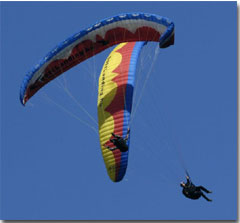
Being the most efficient height loosing maneuver the Spiral Dive is the first thing every pilot should master. It will teach you the control of high energy turns, dealing with higher G-forces and many other skills you will require to do other tricks.
'However it’s not really an acro trick, but one of the most essential maneuvers to learn, since it is the best height-losing maneuver. Together with the Full-Stall these are the two most important maneuvering skills for general safety in paragliding.
During a fast Spiral Dive the pilot is at the same level with the glider, while the leading edge is facing the ground and is about parallel with the horizon. The pilot turns very fast around the center of the rotation and the sink rate can reach over 20 m/s. Because the movement is continuous and the speed of rotation is high, the centrifugal forces on the pilot are the most inconvenient of all maneuvers in paragliding. Even though the G-forces can peak much higher in an Asymmetric SAT or a Tumbling but only for short moments and therefore it's a lot easier to handle it.
To be able to keep a deep-spiral going for longer period of time it is necessary to breath and tension muscles in the correct way, that prevents the blood from leaving the head which could ultimately lead to loss of sight or blackout. I will tell you more about this later.
It is extremely important to learn this maneuver progressively! This will be our first experience with higher G-forces and the body needs to get used to it! In the beginning even a steep turn might become pretty uncomfortable. But we just have to keep practicing and our feeling will quickly improve. The other reason why we need to progress step by step is the exit, the most technical part of the maneuver. The more speed there is in the spiral, the higher the amount of energy that we have to deal with when exiting. Coming out from the rotation with too much energy, can cause troubles.'
Improve your skills with Master Acro!
The complete, 14 minutes long tutorial video is available on Master Acro.
Content overview of the Spiral Dive tutorial video:
(0:13) Spiral dive
(2:08) Preparation
(2:42) Enter and maintain
(4:50) Exit
(5:44) Slowing down
(7:23) Killing the remaining energy
(10:23) Dangers
(12:01) Anti-G straining maneuver
(12:46) Differences on acro gliders
(13:28) Key points
ARCHIVE:
Description:
However it’s not an acro manouvre, but pilots who want to fly acro must learn it first.
The Deep Spiral is actually the most effective height-loosing manouvre. During the Spiral the pilot is about at the same level with the glider, while the leading edge is facing to the ground (even in line with the horizon), and the pilot turns very fast around a center near to the canopy. The sinking rate could be more than 20m/s and the pilot’s rotation speed 110 km/h which also generate a significant G-Force.
Enter:
Shift your weight to the right and start to pull down the right brake gradually. The glider start to turn and accelerate into a Spiral. If you pull more brake, the leading edge starts to be facing to the ground and the descent rate increases like hell…
YOU HAVE TO LEARN THIS MANOUVRE PROGRESSIVELY! AT FIRST START PRACTICING ONLY BY DOING STEEP TURNS WITH LESS WEIGHT SHIFTING AND BRAKE INPUT, TO LEARN SAFE HOW TO LEAD IT OUT.
Exit:
Due to the pretty high cross stability of the paraglider construction, if you center yourself and release the brake, usually the glider exit from the Spiral spontaneously in few turns. You can also help it by pulling the outer (left in our case) brake.
BUT!
Many of the gliders, especially with low aspect ratio (DHV 1-1-2) are „spirally unstable”! It means if you release the brake in a fast Deep Spiral (let’s say over 14 m/s) it accelerates more, instead of exit from the spiral, and it doesn’t recover for itself if the pilot doesn’t do anything! It’s called „Nose Down” or „Over The Nose” Spiral. If it happens, pull down the outer brake really hard (perhaps with both hands!), or pump both brakes symmetrically as hard as you can, to get out the glider from the stable position.
Dangers!
The absolutely biggest danger of the Deep Spiral is if you can’t lead it out and you approach to the ground at very high speed (possibly with more than 70 km/h!). IN THIS CASE, IF YOU’RE CLOSER THAN 300 METERS TO THE GROUND, IMMEDIATELY THROW YOUR RESERVE, OTHERWISE YOU WILL PROBABLY DIE, EVEN IF YOU CRASH INTO WATER!!! In a Nose Down Spiral the pilot has to stand up against high G-Forces (possibly over 4 G!) and because of the permanent loading, the blood goes out from the head and it can induce loosing the vision and furthermore black-out, what’s also definitely equal with death!
The DHV test the gliders only up to 14m/s in Deep Spiral, so over this descent rate, the behavior of the glider can be very different!
Anyway, you can also get very big collapses if you lead out the spiral too fast, without bleeding out the energy gradually and you don’t control the situation right.
Be very careful and learn this manouvre gradually!
Horseshoe
Description:
This trick is as easy as spectacular, especially in beginners eyes.
During the maneuvre, the glider looks like a horseshoe (shape „U”), whilst the canopy is still inflated and the horizontal speed gone. Because in a stable Horseshoe the descent rate is about 6m/s, it was instructed as a possible height-losing manoeuvre (just as big ears or spiral dives), however it was also on the official aerobatics competition manoeuvres list till 2004.
Enter:
Without releasing the brakes, grab the two middlemost „A” lines as high as possible. Gently and symetrically start to pull down the lines. Now the middle of the leading edge will collapse. As you continue the pulling, the wingtips starts to approach and finally they touch each other in front of you.
It’s almost impossible to do this trick with a DHV 1 or 1-2 glider (low aspect ratio, too stable profile).
Exit:
Just release the „A” lines and usually the glider opens spontaneously, but if it doesn’t happens, gently pull down both brakes. After it reopened, the glider has to pick up speed, so don’t brake it too much! Anyway, the glider won’t surge, so you don’t have to brake it at all.
However I've never experienced any problems during this manouvre, if there’s any reason, why you can’t open the glider, perform a Full Stall to return to normal flight (of course, only if you have enough height!).
Dangers!
You can get a frontal collapse if you pull down the lines too fast at the beginning.
After the exit, the glider is in deep stall figure for few moments, so let it fly and handle the brakes very carefully, the glider can easily stall!
Full Stall
Description:
The Full Stall (stalling the whole glider) is one of the most important manouvres, what you have to practiece a lot, if you want to learn other acro tricks. You will have to use it a lot for sure! Many times when you do a mistake, there’s no other fast and safe way to get back the control over the glider. It’s also very important to get to know the limits of your wing. In a word, if you became confident with Full Stall, you will fly and doing acro much safer!
Preparation:
To prevent riser twisting, set your harness to sitting position, open the chest strap as much as possible and put your legs under the harness. Take one wrap if the brakelines are long.
Enter:
Slow down the glider to minimum speed by gently and symmetrical braking. When it’s stabilized above you (it doesn’t swing anymore), immediately pull down the brakes as much as you can. As the airflow on the whole glider gone, the wing stalls and falls back behind you. Don’t be afraid, you will feel like somebody pull you back. KEEP the brakes locked at least until you swing back under the glider.
At the beginning the glider will pulse heavily (because you keep the brakes very deep) and it’s quite difficult to control the Full Stall like this. To stabilize it slowly and simmetrically release the brakes around to the level of your elbows (of course it really depends on the type of the glider and the brake setting!), until you notice the canopy calms down, doesn’t pulse anymore, the brakes don’t yank, and it’s much easier to keep them. This position is called Stabilized Full Stall. Now the glider is mostly opened, only the wingtips are collapsed and facing to the front, whilst you are flying backwards (almost as a Tail Slide). It may needs a little bit more practicing to find this point.
Exit:
During the Full Stall if it is not stabilized, the glider is pulsing and the pilot also swinging a little bit underneath the canopy. When the glider is above, or a little bit in front of you, quickly release the brakes up to slightly braked position By this the glider starts to reinflate and shoot forward as it picks up speed. Just after the glider started to surge, brake it carefully to prevent collapses. The more violent it shoots forward, the stronger you have to brake to stop it.
From a stabilized Full Stall, it’s very easy to exit, because the glider is smoothly over your head. Just release the brakes quickly, than control the following surge by gently braking.
If you see the glider will shoots forward asymmetrically, brake only the faster side (which is lower) until the slower one accelerates and comes down to the same level. Than stop it with symmetrical braking, as usual.
Dangers!
When the glider stalls because of your pendulum you will go further than your wing (the glider slows down faster than you can) and it will be far behind you for few moments. NEVER EVER RELEASE THE BRAKES WHEN THE GLIDER IS BEHIND YOU, BECAUSE THE FOLLOWING SURGE CAN BE SO STRONG, YOU CAN EVEN FALL INTO THE CANOPY!!! It’s easy to imagine why: the glider starts to fly and shoots forward very violently at the same moment you swing back from a big pendulum. This two effects togather generates the dynamic movement, which can be easily strong enough to fall into, or even behind the wing!
It can also happens that one of your hands goes up unintended because of the heavy brakes (especially when the glider is pulsing). In this case you have to choose what to do. You can release the other brake immediately and lead out the Full Stall, or you can also try to pull it back quickly, but if you are not fast enough, the glider starts to Spin very fast and you can easily end up in a riser twist. Please read also the dangers of Spin and riser twisting. Anyway, the amount of the brake pressure during the Full Stall is various, from glider to glider.
Maybe the most critical part of the Full Stall is the exit. The glider has no horizontal speed (actually it’s even sliding backwards!) and it has to accelerate. Be careful, if you brake the glider too hard when it shoots forward, it can easily stall again (usually asymmetrically!), however if you don’t brake it enough you could get VERY big collapses and cravattes! If you start to spiralling down with a cravatted wing, and you don’t have hundreds of meters below you, don’t hesitate to throw your reserve!
Don’t practice this manouvre if your glider is overused and its porosity is bad (anyway, don't do ANY aerobatics with wings like that!), because you can easily end up in deep stall (parachutage) after the exit, especially if you release the brakes too slow, and you don’t let the glider to pick up speed! However if it happens, pull out your speed bar, or if it’s not prepared, gently pull forward the „A” straps with your palms to accelerate the glider and get out from the deep stall.
Spin
Description:
During the Spin one side of the glider turns backward (negative) whilst the other still flying forward (positive) by keeping the negative side under stall point. During the manouvre usually the glider oscillates, the pilot swings a bit forward and backward under it, and the negative side’s tip collapses to the front (not backwards as a normal collapse).
Preparation:
To prevent riser twist, set your harness to sitting position, release the chest strap as much as possible, put your legs under your harness and be ready to turn with your glider. Take one wrap if the brakeline is too long.
Enter:
In the following text I describe a Spin to the left.
Slow down the glider to minimum speed by slowly and symmetrically braking and wait until it stabilized above you (you are not swinging anymore). At the same moment, release the right brake, grab the right riser and pull down the left brake immediately, just as you would do a Full Stall, but only to one side. As the airflow of the left side gone, the glider starts spinning.
Or
Without slowing down the glider, grab the right riser and pull the left brake all the way down. Because you enter the spin from trim speed, you swing out from under the glider (due to the pendulum of your body), and the glider will spinning a bit in front of you for 1-2 turns.
Exit:
Pull down the right brake to stall point and Full Stall the glider to return normal flight. I advise to use this technique at the beginning, cause it’s much easier and safer (you can make a nice symmetrical exit)!
Or
Release the brake when the glider is above or a little bit in front of you, than brake the following surge!
The spin is usually not stable, the glider oscillates, you are swinging under the canopy and the glider slows down and accelerates. Try to exit when the turn slows down, it decreases the danger to get a riser twist and/or an asymmetrical surge.
Or
Release the left brake only a little bit and pull down gently the right at the same moment (take care not to make a Full Stall). As the glider slows down, release the left brake even more. Now the glider stops and shoots forward.
Dangers!
If your body cannot turn or stop as fast as the glider, you can easily end up in a riser twist. If it happens try to lead out the Spin as fast as possible and resolve the twisting by moving your legs or grabbing the lines over the twisting and try to turn back yourself. If you are twisted in two or more times, the brake lines could stuck and you completely loose the control over your glider. In this case, the glider could starts to spiraling down or continue spinning or full stalling. Grab the brakelines above the twist, Full Stall the glider and try to untwist. If you don’t have lot’s of hundreds of meters below you to resolve the problem, don’t hesitate to throw your reserve!
After the exit, the wing has to pick up speed, so don’t brake the surge too hard, otherwise the glider can easily stall again (usually assymetrically)! However if you don’t apply enough brake, you could get big collapses and cravattes!
If you release the brake when the glider is far behind you, and don’t brake it hard enough, you’re in trouble. Such as in Full Stall, the following surge can be so strong, YOU CAN EVEN FALL INTO THE CANOPY!
Do not try this manovure with seated harness because it extremely increases the danger of riser twisting!
Be very confident with Full Stalls before you try this trick.
Tail Slide
Description:
During the manouvre the glider fly (or preferably „slide”) backwards while it’s mostly still inflated. The Tail Slide is the very narrow passage between the deep stall (parachutage) and the Full Stall. However, basically it’s a quite simple manouvre (it has almost the lowest coefficient on competitions), it needs a very precise control from the pilot to do it really nice. It’s probably the best manouvre to check an acro pilot’s ability, that’s why the judges always put it into the compulsory manouvre list for the qualification runs.
Preparation:
To prevent riser twisting, set your harness to sitting position, open the chest strap as much as possible and put your legs under the harness. Take one wrap if the brakelines are long.
Enter:
From trim speed, slow down the glider to minimum speed. When it stabilized over your head (doesn’t swinging anymore), put your feets under the harness and pull down the brakes just a little bit more. At this moment the brakes became lighter and the you enter a parachutage stall (deep stall). Release the brakes only few centimeters to stabilize the deep stall, than slowly brake just a little bit more until the glider starts to fly backward with slightly collapsed wingtips facing to the front.
Or
Enter a Stabilized Full Stall. When the descending is stable, without any turning and oscillating, slowly release the brakes even more until the glider almost totally reopens (keep the tips only a little bit collapsed).
Exit:
Release the brakes quickly and symmetrically, than brake the following surge (just as in a Full Stall exit).
Dangers!
If you pull too much brake (I mean few centimeters!), you can easily Full Stall the glider. Please read also the dangers of Spin and Full Stall, included riser twisting. Be very confident with Full Stalls before you try this trick.
Don’t do this manouvre if your glider’s porosity is bad, because you can easily end up in a deep stall.
Video:
There is no video clip about this trick yet.
SAT
Description:
This manoeuvre was invented by Raul Rodriguez in 1999. The name comes from the name of his team, the Safety Acro Team. Actually it’s a kind of spiral, wherein the center of the rotation is between the glider and the pilot. It means, the glider turns forward, (positive) while the pilot turns backward (negative). The sinking rate is pretty low, somewhere between 2-6 m/s, depends on the glider and the execution of the manoeuvre.
The SAT is the basis of some other manoeuvres such as Asymmetric SAT, Tumbling and Rythmic SAT.
Enter:
If you want to do a SAT to the right, grab the left riser, push it out as much as you can, and shift all your weight to the right. It’s called SAT position. Take one or two wraps on the right brake (If your brakelines are long, it’s more comfortable to take two, because then you don’t have to pull the brake so deep, however I advise to do the first attempts only with one wrap, because there’s less risk to pull an unintended Spin. Probably you’ll be able to enter the SAT like this, but maybe you cannot turn it up very steep). Start to pull down the brake gradually, just like as you lead in a Deep Spiral but dynamically. After about 3/4-1 turn, as the leading edge starts to be facing the ground and the brake is getting heavier, pull the brake even further just a little bit faster (but still gradually!), around to your nipple (but of course it depends on the glider’s type and the brake setting). Now the center of the rotation is changed, the right side of the wing will be higher and you’ll lean down to the left in your harness. Keep yourself in SAT position by your left hand, don’t let yourself slide down. You’ll see there’s almost silence in the SAT, you are turning slowly, unlike in Deep Spiral.
Once you’re in, you can adjust the steepness (the angle between the leading edge and the horizon) and the speed of the rotation by the right brake. As you add more brake, the leading edge will be steeper according to the horizon, and it decreases the speed of the rotation, the sink rate and the G-Force also. But be careful, do not pull a Coconut Spin unintentionally. The maximum angle of the SAT, where the profile of canopy is still unbroked is various from glider to glider.
In a stable SAT, you can release your left hand, but keep yourself in SAT position (One-Handed SAT).
From my experience, it’s easier to SAT low DHV rated gliders (like DHV 1, 1-2), because on these types you have much more time to enter (you don’t have to be so precise) and due to the lower Spin tendency, it’s also much safer. I advise to learn this manoeuvre on one of these gliders, and once you did some successful SATs, it will be pretty easy to do it on other gliders.
Anyway, there are some gliders, especially older types, but also some of the newer designs, which are not able to do the SAT. Make sure you don’t fly with one of these wings before you try this trick.
Exit:
Just center your body and release the right brake quickly. The movement will transform into a simple Spiral Dive. Lead it out gradually by few turns. Usually the lower wingtip collapses for a moment at the exit, but it doesn’t matter. With some gliders, you can prevent it by releasing the brake a bit slower, or use some outer brake at the exit.
Dangers!
Like in almost all acro manoeuvres, the most important thing is the right timing.
If you try to lead in too early, the glider won’t have enough energy to enter the SAT (too big angle between the leading edge and the horizon), and as you pull the brake very hard you’ll end up in a dynamic Spin and you can easily get a riser twist, big cravattes etc. Please read carefully the dangers of Spin, especially riser twisting. Anyway, if it happens, Full Stall is the safest way to return normal flight. Before you try this manoeuvre, be very confident with Full Stalls!
If you don’t brake enough or try to enter too late, the glider will have too much energy to SAT and you will enter a very dynamic Spiral Dive. In this case you won’t be able to enter the SAT anymore, even if you pull down the brake really hard, so immediately release it and lead out the Spiral (Ok, it’s not impossible with some damped gliders, but it’s better to exit anyway).
If you leave your body in SAT position at the exit (still lean to the right pretty hard), you may enter a Nose Down Spiral. This kind of spiral is very fast and stable and it doesn’t recover for itself if the pilot doesn't do anything!
Please read very carefully the dangers of Nose Down Spiral and before you try this trick, learn how to exit from fast descending Spiral Dives.
Wing-Over
Description:
The Wing-Over is a series of dynamic turns, whilst the pilot swings „over the wing”. It’s the base of the whole acro paragliding, but also a pretty difficult manouvres to learn (especially because you just start acro when you try the first Wing-Overs). The key of this trick is the perfect timing of weight shifting and braking.
Preparation:
Open the chest strap of your harness as much as possible to make it more sensible for weight shifting. Take one wrap on both side if the brakelines are long.
Enter:
Start a fast turn to the left by weight shifting and braking. Just after you starts to dive, release the brake, shift your weight to the right, and pull the right brake when you are at the lowest point. Now as the glider roll to the other side, you swing up and the canopy will be in front of you. Brake the glider by both brakes at the highest point to prevent collapse on the upper side of the wing. Once you start to dive again, release the brakes, shift your weight to the left and pull the left brake on the lowest point. Don’t forget the braking on the upper death point! As you continue this movement you will swing up higher and higher.
Advanved technique:
Complete your turns (do more than 180 degrees turns) to get a closed „8” figure movement instead of a series of „S” turns. If your technique is right and you have enough energy, you don’t have to brake the glider at the highest point anymore, just like in a well done Looping. Note that to be able to leave the braking at all you need a pretty dynamic glider and good technique.
If I want to built up the Wing Over faster, I always start with a short Spin. Pull down the brake pretty hard immediately, until the glider starts to spin. After it turned about 45-90 degrees, release the brake and control the following surge. As you swing back under the glider, you pick up speed, and by using this energy you’ll be able to reach the level of the glider (or so) just in the next turn. Please don’t try this way before you are not confident with the normal technique and Spins.
Exit:
You have to bleed out the energy gradually. The simplest and safest way is to lead out by 1-2 complete turns. If you are not confident with Deep Spirals, choose the next option:
Decrease the amplitude of the Wing-Over by less weight shift and brake input, until you are not swinging anymore.
Dangers!
If you don’t brake (or not enough) the glider at the highest point, you can get huge and dynamic collapses on the upper side (big danger of large cravattes, riser twists etc.).
At the beginning start the weight shifting just after you pass the highest point, and pull the brake before the lowest. By this your Wing-Over won’t be so high, but it will be more dynamic and safer. When you feel confident, you can pull it later and later, to increase the amplitude of the turns. Be careful, if you start to brake after the lowest point, the following turn could be very high, but you loose too much energy and there’s high risk to get a big collapse on the top of the roll (and than you fall down next to the canopy!). However if you feel it’s gonna happens (you slow down too much, and the lines starts to loose the tension) pull down the brakes deeply until you start to swing back under the glider (the brake pressure will be very slight) to prevent the collapse or leastwise to moderate the consequenses.
Asymmetric Spiral
The Asymmetric Spiral is actually a Wing-Over, but only to one side. The timing of weight shifting and braking is also pretty similar. You don’t swing up as high as in a Wing-Over, but with more energy. This is the reason, why the most powerful manouvres (such as Looping, Asymmetric SAT, Tumbling) are entered from Asymmetric Spiral.
Enter:
Start making big Wing-Overs. Once it feels good, and the timing is right, continue the movement only to one side (to the right in our case), without changing the direction of the turns:
After you pass the highest point in the last Wing-Over turn to the right, adjust a straight and symmetrical dive by weight shifting to the left. Add massive amount of brake input and weight shifting to the right at the same moment you’re straight under the glider. It will result in a very fast but not so high turn. Don’t leave your body on the right and don’t keep down the brake, only a short but impressive input is needed. After you pass the highest point and start to go down, shift your weight to the left to get a symmetrical, straight dive again. Than right brake and extremely weight shift on the lowest point to the right and so on…
The differences between the timing of a Wing-Over and an Asymmetric Spiral:
In a Wing-Over you start weight shifting way before the lowest point, and pull the brake at, or close to the lowest point.
In an Asymmetric Spiral you pull the brake and shift your weight at the same moment at, or close to the lowest point (it depends how dynamic/high Asymmetric Spiral you want to built up).
In a Wing-Over after you start another turn you leave your body on the side, and keep down the brakes. By this you lead the way of the turn.
In an Asymmetric Spiral to start another turn you just give an impressive input to the glider by a short but hard braking and extreme weight shifting. At the moment the turn started, you release the brake and shift your body back to the center.
Or
Perform a SAT to the right. Lead it out quickly and shift your weight to the left to get a straight dive. On the lowest point brake and maximum weight shift to the right…(from here same as above).
If you want to enter another manouvre from Asymmetric Spiral which needs lot’s of energy (like Looping, Asymmetric SAT, etc.), start weight shifting and braking before you reach the lowest point. By this the asymmetric turn won’t be so high, but more dynamic.
Due to the bigger momentum, you don’t need to brake on the top at all, but some gliders has the tendency to get a small tip collapse on the outer (left) side during the turns. You can prevent it by apply some left brake after you start to swing up. It’s important because you can loose lot’s of energy even by a small tip collapse
Exit:
Bleed out the energy gradually by 1-2 complete turns.
Dangers!
All dangers of Wing-Over, like collapses and cravattes, if the timing is bad.
Dynamic Full Stall
Description:
Entering a Full Stall from a dynamic movement, when the glider is far behind the pilot. It could be so strong, that the pilot reach the level of the glider for few moments.

Preparation:
To prevent riser twisting, set your harness to sitting position, open the chest strap as much as possible and put your legs under the harness. Take one wrap if the brakelines are long.
Enter:
Accelerate the glider with the speed bar or lead in a dynamic manouvre like, Deep Spiral, Asymmetric Spiral, SAT, Wing-Over, etc. Lead it out quick, without bleeding out the energy gradually. Take care on the symmetry, so you have to pass straigt under the middle of the canopy! After the lowest point, you starts to climb with lot’s of speed. Help it by slowly pull down the brakes a bit. Just before you would reach the highest point, pull the brakes all the way down to Full Stall the glider. At this moment you can experience zero-gravity! Be prepared, it will be much harder to keep the brakes locked, as you swing (almost fall) back under the glider and it takes also much more time and height as in a normal Full Stall.
For taking speed I recommend the Asymmetric Spiral or the Wing-Over insted of the Deep Spiral, because due to the kind of movement, it’s much easier to adjust a symmetrical dive under the canopy.
Exit:
Keep the brakes locked until you return under the glider and it doesn’t swinging anymore, than lead it out as a normal Full Stall.
Advanced technique:
Just after the glider stalls, release the brakes until Stabilized Full Stall position (while you are falling back). By this the glider will mostly keep it’s shape. As you return under glider, release the brakes even more, than brake the following surge, what could be pretty violent!
This is the fastest possible exiting of a Dynamic Full Stall. Be careful, if you release the brakes too much while it’s far behind you, the glider will shoot forward extremely and you can easily fall into the canopy!
Dangers!
All dangers of Full Stall, and it can be much harder to keep your arms down. Before you try this trick be very advanced with the normal Full Stall! Start practiecing with less energy, and increase the dynamic gradually, only if you feel confident!
Looping
Description:
During the Looping, the pilot passes above the middle of the canopy. This is one of the oldest aerobatic manouvres what was invented around 1994 by the acro pioneer, André Bucher.
Entry from Asymmetric Spiral:
Build up a dynamic Asymmetric Spiral. Once the timing is good and you have lot’s of energy, reverse the turning direction of the Asymmetric Spiral and pulling the next turn to the other side, just like in a Wing-Over.
When you start practice this trick, start extreme weight shifting quite early, just after you pass the highest point in the last asymmetric turn. Then pull the brake just before you would swing back straight under the glider. By doing this Looping won’t be so high, but faster and safer. Then, if you feel confident, start the looping later and later (even after you pass the lowest point) until you roll very high above the glider. If the pendulum is big enough, the lines will be tight all the way, so you don’t have to brake the glider at the highest point, however sometimes you have to brake very hard to prevent a huge collapse.
Entry from Deep Spiral
At the old times, before the Asymmetric Spiral was invented, the pilots entered loops from Deep Spirals, but many times they ended up falling down next to (or into!) their canopy. I strongly advise you not to try this technique unless you are very confident with Loopings entered from an Asymmetric Spiral and you have a dynamic glider.
Actually, because there’s more energy in the Deep Spiral than in the Asymmetric Spiral, you can do the highest and the most beautiful Loopings like this. In general with gliders which make nice and high wing-overs, it’s really easy to do the Spiral-Loop. Anyway, it can be very risky!
Accelerate the glider into a Deep Spiral gradually by braking and weight shifting. After a few turns, when the glider is already in front of you (the leading edge starts to be facing the ground) and the centrifugal force is already pushing you back in the harness, release the inner brake immediately, shift your weight to the other side as much as you can (take care to dive symmetrically under the wing, as you come out from the spiral) and add massive amount of brake input at the lowest point or even a bit later. Take care of the outside wingtip while you are accelerating into the Spiral. If it collapses you may lose lot’s of energy , so you should reopen it and stabilize the descent again before starting the Loop. If your glider has the tendency to do this, you should apply some outside brake in the Spiral to prevent it.
Make sure to have enough energy for the Looping. It’s better to have more speed than less, otherwise you can easily get huge collapses and even fall into the canopy!
Entry from Wing-Over
You can also increase the amplitude of a Wing-Over gradually until you do series of inversions but it needs a really dynamic glider.
Exit:
Bleed out the energy gradually completing 1-2 turns.
Dangers!
If you don’t have enough energy to loop you can easily get very big collapses and cravattes, and there is a high risk to fall among the lines or even into the canopy. Be very advanced with big Wing-Overs and Asymmetric Spirals, before you try this trick.
Asymmetric SAT
This trick was invented by Raul Rodriguez in 2000. It’s a SAT, leaded in from an Asymmetric Spiral. The axle of the rotation is steep (could be around 135 degrees), so the pilot swings above and under the level of the glider. Normally the energy run out after few turns. The Asymmetric SAT is a perfect practice for the Tumbling, so if you want to learn that, you have to master this trick! During this manouvre you can experience 3-4 positive G’s, so it’s also great to get to know and get used to these higher loadings.
Enter:
Build up a dynamic and well timed Asymmetric Spiral to the right. After you pass the highest point in the last asymmetric turn, grab the left riser, quickly take a wrap on the right brake (if it’s needed to enter a SAT normally), and pull a SAT to the right with extremely weight shifting, at the same moment you would make the next asymmetric turn (when you are straight under the glider). You should pull in the brake quickly and hard, but be careful, don’t do a MacTwist unintended!
When you try this manouvre at first, start weight shifting and braking before you reach the lowest point. By this the Asymmetric SAT won’t be so high, but more dynamic and safer. Than you can start it later and later to make it higher.
Or
You can also enter from a Wing-Over with the same technique, but only to the same side as you did the last turn! If you do it to the opposite side that would be more like a Tumbling! Acutally there’s more energy in an Asymmetric Spiral, than in a Wing-Over, so it’s better to choose the first way. Don’t forget: speed = safety.
Advanced technique:
It’s possible to keep the energy of the Asymmetric SAT for few more turns by rhythmical braking. Pull more right brake immediately when you start to swing above the glider again (at the moment you feel the highest G-Force), and release it on the opposite side of the turn.
If your timing is bad, the Asymmetric SAT will transform into a simple SAT, instead of keep it’s energy or even getting higher.
Exit:
Depends on the height of the Asymmetric SAT, you can exit 2 different ways:
If the Asymmetric SAT is not soo high, the movement will transform into a simple SAT just by keeping the brake (you can help it by pulling it a little bit deeper as the energy run out). So in this case, lead it out as a SAT. However you doesn’t swing above the glider anymore, you’ll feel it pulsing a little bit in each turn!
If the amplitude is bigger (the angle is around 135 degrees or even more) you have to brake the glider to stop the rotation, just like in a Tumbling. Usually you can do 2-3 turns safe, depend on your technique and the type of the glider. I advise to exit these kind of Asymmetric SATs after 2 turns at the beginning. Than later if your technique is advanced and you’re sure there’s enough energy for more rotation(s), you can keep on the manovure.
Look at your glider. During the Asymmetric SAT, as you are swinging above and below the level of the glider, the canopy looks under the over the horizon from the inside (you see the ground and the sky behind the glider . At the end of the second turn, when the glider would reach the horizon (and starts to shoot below you for the third time), stop it by both brakes to exit the Asymmetric SAT. Actually you already brake the right side pretty hard, so you need to pull down only the left one (but sometimes strongly!). Release the brakes as the glider stops in front and you start to swing back under the wing.
Dangers!
The most important thing is the right timing of the exit. Don’t try this manouvre until you can imagine absolutely clearly what will you see from the inside, (anyway it concern to all aerobatics manouvre!), otherwise you can easily loose the orientation and you wouldn’t know what and when to do. If you don’t stop the glider in time, and it starts another turn without enough speed, the energy could run out when you’re over the glider, and you can get a huge collapse and fall down next to the canopy or even into the lines!
Because of the big pendulum it’s more difficult to pull a negative at the enter, but be careful, don’t do a big MacTwist unintented!
During this manouvre the glider is under extremely increased loading. Make sure your glider’s condition is good enough to stand out these high G’s, otherwise the lines and even some parts of the canopy can break! It’s also not much fun if your brakeline gone in the middle of the manouvre… In this case you manage to stabilize the glider, go to land as soon as possible using the „D” riser. If one of the „A” or „B” lines break, the loading on the rest will increases and many others will follow. If the canopy is not safely steerable anymore, don’t hesitate to throw your reserve!
Mac Twist
Description:
From a dynamic movement a Negative Spin is performed. Due to the big pendulum, the pilot swings out from under the glider while it’s spinning 1 turn extremely fast on it’s side (at the same level with the pilot).
It’s one of the most spectatular but also the most dangerous manouvres so through safety reasons, you have to learn this trick gradually. First of all, be expert in performing Spin and Dynamic Full Stall. Start practiecing only with small amount of energy and increase the dynamic only if you feel confident and safety.
Preparation:
There’s extremely high risk of getting a riser twist. To prevent it, set your harness to sitting position, release the chest strap as much as possible, put your legs under your harness and be ready to turn with your glider. Don’t try this manovre with lying harness!
Enter:
There are several different ways to lead in a MacTwist:
Grab the left riser and start to lead in a SAT to the right. Just before you would enter the SAT as normal, pull more right brake immediately. Now the glider will Spin while it’s in front of you.
Actually it’s not really a Mac Twist (you doesn’t swing up), preferably a very dynamic spin, but the movement is pretty similar so it’s a very good practice.
Or
Enter a manouvre such as Asymmetric Spiral or Wing-Over. Lead it out quickly and symmetrically, without bleeding out the energy gradually, to generate a significant climb (just as you would make a Dynamic Full Stall). Grab the outer riser and pull a negative at the same moment you reach the lowest point. Due to the big pendulum, you swing up while the glider spins far behind you.
You can also enter a Mac Twist with taking speed by a dynamic surge, for example after exiting from an Asymmetric SAT or Tumbling.
Depends on the glider and the amount of the energy at the entry, it could be pretty hard to Spin the glider due to the increased brake pressure, so be prepared for it. You may also have to take extra wraps on the brake.
Do the Mac Twist always to the same direction as you did the last turn before.
If you have lot’s of energy, you can wait a little bit more and start the negative after you passed the lowest point. It will be also easier to spin the glider, because the brake became lighter as you start to climb. However, be careful not to wait too long otherwise you may lose too much energy, the glider won’t turn fast enough and you can get big collapsed and cravattes.
To generate very fast rotation you have to start early, when the energy (and the brake pressure..) is on it’s highest.
Exit:
Keep spinning the glider until you swing back underneath, than gently pull down the outer brake to stop the rotation. Once you stabilized the glider, let it fly (release the brakes), and control the following surge.
You can also lead it out with Full Stall, what can be easier and safer at the beginning.
Dangers!
All bad things can EASILY happens, from very large cravattes, through riser twisting (extremely high risk!) and finally to throwing your reserve…
If you cannot pull the brake hard enough to spin the glider, you may enter an Asymmetric SAT, so be prepared what to do in this case.
At the moment you lead in the Mac Twist the lines are under extremely increased loading, especially on the negative side! Make sure your equimpent’s conditions is good enough to stand out this, otherwise some of the lines can break! It’s also not much fun if your brakeline gone in the middle of the manouvre… In this case if you manage to stabilize the glider, go to land as soon as possible using the „D” riser. If the canopy is not safely steerable anymore, don’t hesitate to throw your reserve!
Misty Flip
Description:
The Misty Flip is a perfectly controlled 360 degrees Spin of the glider with high pitch. At the exit the glider shoots forward very dynamic, instead of getting into deep stall, like in a MacTwist.
Preparation:
There’s very high risk of getting a riser twist. To prevent it, set your harness to sitting position, release the chest strap as much as possible, put your legs under your harness and be ready to turn with your glider. Don’t try this maneuver with laying harness!
Enter:
Start practicing like this:
Fly straight and from trim speed, pull down one brake quickly to stall the glider. After the rotation began, release the brake a little bit to keep the wing open as much as possible (just like in a Helicopter). Release the brake completely at the moment the glider is behind you (the leading edge points up). Now the glider will shoot forward to the same direction you’ve entered. Break the following surge.
After you became confident with this basic technique, increase the speed of the entry gradually by starting one or two slight Wing-Over turn before.
It’s not necessary to get symmetrical dive, you can also be a little bit on the side at the entry, but in this case never do the Misty Flip to the opposite direction.
You can swing even above the level of the glider if you do a Wing-Over and enter the Misty Flip to the opposite side as you did the last turn, but take care to pass straight under the canopy and use extreme weight shift.
Anyway, you don’t need too much energy, it’s also possible to do nice series of Misty Flips by using the energy of the last surge.
If you pull the brake too early or too keep it down too long during at the entry you may end up in a MacTwist.
Or
For really impressive Misty Flips (actually it’s called Ass Chopper), you have to perform a Spin to the other side in a Wing-Over or an Asymmetric Spiral (to the opposite side as you do the last turn). However these are the most spectacular and powerful Misty Flips I do not recommend this technique until you are very confident with the basic technique above.
Lead in an Asymmetric Spiral to the right. When you have enough energy to make a loop, grab the right riser and pull a negative with extremely weight shifting to the left, after you pass the lowest point You’ll pass backward and above the glider (just as in a Tumbling!) while the glider is spinning underneath. It could be very hard to perfrom the Spin due to the high brake pressure so wait until you start to climb and loose some energy (than the brake gets lighter).
Exit:
Keep spinning the glider for about 270 degrees, than let it fly at the moment it’s behind you and the leading edge is pointing up, than control following the surge. Normally you exit to the same direction as you’ve entered.
Doesn’t matter which way did you enter from, THE GLIDER WILL SHOOT FORWARD EXTREMELY, SO YOU HAVE TO BRAKE IT VERY HARD, OTHERWISE YOU CAN EVEN FALL INTO THE CANOPY!
Dangers!
All dangers of dangers of MacTwist and above all, you can easily end up falling down in your canopy like a comet…
Helicopter
Description:
The Helicopter is actually a controlled Spin, whilst the glider is totally open, the pilot is straight under the wing, and the rotation is stable (the wing turns like the rotor of a helicopter). The sinking rate is quite low, around 2-3 m/s.
This is one of the most difficult manouvres, which requires very precise brake handling from the pilot. If you really want to learn this trick, you have to go for it, and forget to practice everything else!
Preparation:
To prevent riser twisting, set your harness to sitting position, release the chest strap as much as possible, put your legs under your harness and be ready to turn with your glider.
Enter:
This manouvre is extremely sensible for turbulences, especially during the entering. Try to practice only in completely calm air.
In the following text I describe a Helicopter to the right:
Slow down the glider to minimum speed by gently and symmetrically braking. Once it stabilized over you (doesn’t swinging anymore), apply just a little bit more brake to get the glider into deep stall (the brake pressure gone and the glider loose it’s horizontal speed). When the canopy is completely above you and the descending is stable, release the left brake, grab the left riser, and just keep the right brake (or pull only few centimeters more) at the same moment. Just after the the glider starts the rotation, gently release the right brake almost completely, until the point where you feel the brake pressure starts to increase and the Helico became stable. Usually you have to pull only 5-10 centimeters to keep the glider in Helicopter. If you pull too much brake, the wingtip will collapse.
If during the entering the glider starts to turn a little bit in front, the deep stall was not strong enough (you didn’t brake enough). In this case, you may also have to pull a little bit more on the negative side to start the rotation (and it’s not ideal). Shift your weight to the negative side until you swing back under the glider, than return to the center.
Also take care not to pull to much brake in the deep stall, otherwise the glider gets a little bit behind you (as it starts to slide backwards) and that’s also not a good position to start.
In the Helicopter you can play also a lot with your body. Not only the handling of the brakes, but the right weight-shifting is also important. Above all, at the beginning of your practice the best what you can do is to stay in the center. You also have to learn how to control your body if the rotation is unstable, because you can easily generates big oscillation just by wabbling in your harness from one side to the other and moving your hands (and the brakes!) up and down anawares, cause even few centimeters can makes huge difference!
In a stable Helico, you can increase the speed of the rotation by gently shift your weight to the positive side.
There are only few pilots in the world who are able to correct an ugly Helicopter and switch it to a perfect one. It’s not really an exact knowledge, more like a sense, what everyone has to discover by itself. Especially because the right technique can be different, depends on the glider. But it will come gradually and spontaneously for sure, by hard traning, after hundreds and thousands of Helicopters.
But basically, if the rotation is unstable try the following technique:
Gently pull a little bit on the outside brake to slow down the rotation. When the glider is turning slowly, it calms down and it’s easier to stabilize. Than when the glider is straigt above you, try to find the right moment and accelerate it again by releasing the outside brake slowly. Of course in the meanwhile, right weight-shifting can also help a lot.
Exit:
If the rotation is stable, it’s very simple to exit. Just center your body, release the brake and control the following surge, which is usually a bit asymmetrical.
You can also exit by pulling down the outside brake (but don’t stall it!) and release the negative a little bit, until the glider stops. Than let it shoots forward and brake the surge.
At the beginning the safest way could be to pull down both brakes and Full Stall the glider. Gradually you will get the feeling how to exit safe even from the ugliest Helicos (or Spins) without stalling the glider.
All dangers of Spin Be very confident with Spins and Full Stalls before you try this manouvre. Because the glider has no horizontal speed in Helicopter, the stall point is located higher on the brakes, so you have to make only very gently and short brake inputs not to overreact.
SAT to Helico
Also called: Coconut Spin
Description:
The Coconut Spin is a spinning exit of a SAT.
Preparation:
To prevent riser twisting, set your harness to sitting position, release the chest strap as much as possible, put your legs under the harness and be ready to turn with your glider.
Enter:
Enter a SAT and once you are in gradually pull more right brake. By this the SAT slows down, gets steeper and finally the braked (upper) side stall, the movement transforms into a Spin and you swing back under the glider.
Perhaps you wouldn’t do this for the first attempt because of the unexpectedly high brake pressure. You may have to take an extra wrap on the brake to be able to stall the glider. After the glider’s shape starts to break the brake pressure getting lower and at the moment the Spin began the brake getting very light.
When the glider returns above you, gradually center yourself from SAT position and release the brake until Helicopter position, and if your technique is right, the rotation will transform into a Helicopter.
Exit:
Lead it out as a Spin or Helicopter (Full Stall could be the easiest and safest way).
Dangers!
All dangers of SAT and dangers of Spin. Fortunately the danger of riser twist is a little bit less at the beginning, because you start to spin gradually.
Helico to SAT
Description:
From a Helicopter exit, a SAT entered at very low speed. Pretty difficult manouvre, needs a very precise handling.
Preparation:
To prevent riser twisting, set your harness to sitting position, release the chest strap as much as possible, put your legs under your harness and be ready to turn with your glider.
Enter:
Start a Helicopter to the right. It has to be very stable and smooth! At the same moment slowly shift your weight to the negative side and gently release the brake only few centimeters. By this the glider starts exit from the Helicopter and slowly shoots forward asymmetrically. In the meanwhile grab and push out the left riser as much as you can to prevent a collapse on the lower tip, get your body into SAT position! The right side of the wing stay higher just as in a SAT and slowly you start to rotate around the glider and gain momentum. Wait until the glider picks up enough speed and you start to feel more pressure on the right brake, then pull it back again (still gently) to enter the SAT.
Exit:
Lead it out as a simple SAT.
Dangers!
All dangers of Helicopter, and SAT. If your timing is bad and you try to enter the SAT too early without enough speed or you pull too much brake, you can easily end up in a Spin or get a big collapse on the lower side.
Helico to Helico / Twister
Description:
Reversing the turning direction of a Helicopter quickly, without leading out the manouvre. Very difficult trick.
Preparation:
To prevent riser twisting, set your harness to sitting position, release the chest strap as much as possible, put your legs under the harness and be ready to turn with your glider.
Enter:
Enter a Heli to the right. Once the rotation is stable, stop it by gently pulling down the left brake until stall point (it’s quite high in Helicopter!). As the glider starts to parachutes down, stabilize it, then at the right moment release the right brake (and grab the right riser) and keep the left brake to start a Helicopter to the left.
The more the glider stays open, the more beautiful the twister is, but usually the outside tip collapses a bit as the rotation stops.
If you want to learn this trick, first you have to practice how to enter a Helicopter from Full Stall: After you stalled the glider slowly release the brakes to stabilize the Full Stall. Then release the brakes even more until the glider almost totally opens, but it’s still above you. Release one brake at this moment to start a Helico.
Exit:
Same technique as normal Helicopter.
Dangers!
All dangers of Helicopter, especially riser twisting. Because the glider doesn’t have horizontal speed in the Helicopter, the stall point is located pretty high, so you need only short and gentle brake inputs during the entire maneuver.
Tumbling
Description:
This trick was invented by Raul Rodriguez in 2001. It’s a SAT, leaded in from a Looping. At this moment this is the most powerful manouvre, whilst the G-Force could reach more than 6 G (The danger of losing the vision [„seeing grey”] is possible from 4.1 G, but actually not by a short loading like this). The movement is very similar to the Asymmetric SAT, but the axle of the rotation can be so high, that the pilot passes above the middle of the glider.
Enter:
In the following text I describe a Tumbling to the left:
Start an impressive Asymmetric Spiral to the right. When you have LOT’S of energy, pull a SAT to the left with extremely weight shifting, just at the same moment, you would do the Looping. Than just keep the brakes and enjoy the effect of the high G-Forces…
(When you do an Asymmetric Spiral to the right, and pull a SAT to the right, that would be an Asymmetric SAT, if you pull a SAT to the left (in a Looping) that’s a Tumbling)
Or
You can also enter a Tumbling from a big Wing-Over with the same technique, but I advise you to try the first way, because there’s more energy in Asymmetric Spirals, so it’s much safer! Keep in mind: dynamic = safety!
The most important thing is take enough energy for the enter. With some dynamic acro gliders it’s possible to do nice Tumblings just after 2-3 Wing-Over turns, but with „serial” gliders it’s usually necessary to build up a well timed and really dynamic Asymmetric Spiral to have enough energy to finish the second turn safe. Try the following technique if you need more energy:
Enter a clear deep spiral by braking and weight shifting. Take care not to get a tip collapse on the outside, bacause you loose energy. However if it happens reopen it it and wait until the spiral stabilizes again. After 1-2 turns when the leading edge starts to be facing to the ground and you have quite a lot of speed already, quickly release the brake and shift your weight to the outside, just as you would lead out the spiral very fast to swing down straight under the glider. But before you reach the lowest point with lot’s of speed, start an impressive asymmetric turn to the same side, much earlier as you do it in a normal Asymmetric Spiral. The following turn will be really dynamic but asymmetric, so it’s very good to enter a Tumbling from. To enter the Tumbling you have to start weight shifting quite early, after passing the highest point, than pull the brake just before or on the lowest point.
Advanced technique:
If you just keep the brake locked, with some gliders the second turn will be higher but slower than the first. When the pilot is above the glider in the second turn, the energy is on it’s lowest, until the pilot passes trough. Because the brake is pulled very hard, during these moments the glider turns a little bit steeper in the SAT (except this period the brake is too heavy and it cannot happens because of the high tension and speed). By this the second turn will be more vertical, but with less energy.
If you want to prevent this angle change you have to release the brake a little bit on the top of the second turn.
If you want to keep the height and the energy of the first turn do the same on the top of the first turn as well (by releasing the brake the glider shoots forward faster so it gets more energy). In this case pull back the brake at the moment the glider starts to shoot below and you experience the highest G-Force. You can see this technique working in the Tumbling video clip.
Exit:
Lead out the Tumbling by braking the glider when it starts to „dive” again, just like in Asymmetric SAT. If the remaining energy is considerable, you should brake the glider pretty hard to stop the glider otherwise you will get a huge collapse and free fall down next to, or into the canopy! At the exit the glider (especially with high aspect ratio) could get a shape „U” while it’s in front of you, due to the forceful braking.
If there’s less energy at the end, you may have to perform a Full Stall when you swing back under the glider to return normal flight.
Just as in Asymmetric SAT, the right timing of the exit is the most important thing ever (that’s why it’s necessary to know the Asymmetric SAT very well before you try this trick)! With a serial glider it’s possible to do 2 times tumbles safe. The best acro pilots can do 3 or maybe 4 tumble turns with dynamic acro wings, but that’s more like a Rhythmic SAT than a Tumbling. I strongly advise to exit the Tumbling after 2 turns, exept if your technique is advanced and you are absolutely sure there’s enough energy to do the next loop.
Advanced technique:
Usually the glider shoots forward very violently and asymmetrically (much more radical than in the Asymmetric SAT!), so it’s hard to stop and you can easily get very big collapses on the lower (outer) side. To make the surge more symmetrical, try the following technique:
Release the inner brake (left in our case) a little bit in the second turn, when the glider is above you (you see the sky behind). Wait just a moment, than start braking only with the right side and only than pull the left also.
In a left Tumbling the left side is higher, so if you release that brake, and than pull the right first, the leading edge will turn to be facing to the horizon (because the left side accelerates) and it’s an easier and safer situation to stop the glider.
Dangers!
All dangers of Asymmetric SAT and even much more, because if you try to do another loop without enough energy you can easily fall into the canopy. Also be prepared for the massive impact of high G-Forces!
Because of the big pendulum it’s more difficult to pull a negative at the enter, but be careful not to do a big MacTwist unintented!
During this manouvre the glider is under extremely increased loading. Make sure your glider’s condition is good enough to stand out these high G’s, otherwise the lines and even some parts of the canopy can break! It’s also not much fun if your brakeline gone in the middle of the manouvre… In this case you manage to stabilize the glider, go to land as soon as possible using the „D” riser. If one of the „A” or „B” lines break, the loading on the rest will increases and many others will follow. If the canopy is not safely steerable anymore, don’t hesitate to throw your reserve!
As you can see this is a very complex manouvre (the combination of Asymmetric Spiral, Looping, SAT and others…), please do not try it, until you are really advanced with most of the acro manouvres.
Rhythmic SAT
Description:
This maneuver was invented by David Arrufat. It is one of the most difficult maneuvers and still only a few pilots are able to do it nicely. The Rhythmic SAT starts with a simple SAT which gradually transforms into a Tumbling, increasing the amplitude of the turns by rhythmical brake input. A perfect Rythmic SAT ends up in Infinity Tumbling, wherein the pilot passes straight above the canopy. Only the best, most dynamic acro gliders are suitable to perform this maneuver nicely.
Enter:
Lead in a SAT to the right. Wait more than usual, take as much speed as possible before you enter. Right after the glider changes the angle into SAT with lot’s of energy quickly release the brake completely to let the glider shoot down below you. Wait until the glider reaches the lowest point below you and pull back the brake hard and deep to adjust high angle of the glider again. Than, at the same moment you feel the highest load on you release quickly again. By this you start to swing above the glider. At the beginning you have to repeat this movement pretty fast because till the Rythmic SAT is flat the glider completes one turn in a short time. As it starts to build up the rhythm is getting longer and longer but the timing still the same: pull the brake strong but gradually after you pass the highest point, than release immediately when you have the maximum speed, at the same moment you reach the lowest point under the wing.
It’s also possible to built up a Rhythmic SAT, from an Asymmetric SAT. In this case the rhythm is given and you have to follow it. If you start with a simple SAT, you create the rhythm.
Exit:
Lead out as an Asymmetric SAT, Tumbling or Infinity, depends on which period you are in. The most important thing is to learn when is it necesarry to exit the maneuver, before the wing would collapse. The glider always gives you warnings when it’s enough. One sign if the outside tip looses the pressure and collapses when the glider is below you. Even by a small collapse you loose a lot of energy.
Dangers!
All dangers of Tumbling. Furthermore in Rhythmic SAT there’s much less energy compared to a normal Tumbling, so the danger of gettting a huge collapse and falling into the canopy or among the lines is even higher, if you start another turn without enough dynamic…
Never practice this maneuver in turbulent conditions!
Video:
Coming soon...
Misty to Tumbling
Description:
One of the latest aerobatic tricks, the Misty Tumbling was invented by Herminio Cordido in 2003.
This maneuver starts with an extremely dynamic Misty Flip, which is a perfectly controlled 360 degrees spin of the glider with high pitch. During the exit the pilot swings down with a big momentum and at the same time the canopy shoots forward very fast. Instead of stopping in front the pilot lets the glider go beneath with full speed. If everything goes well the following dive is big enough to pass above the wing in Tumbling movement. To perform this maneuver not only the pilot’s skills are necessary but a specific glider too. It is like Infinity Tumbling, only the best acro-wings are suited to this.
Enter:
Grab the outside riser and lead in a powerful Misty Flip or AssChopper entered from Wing Over, Asymmetric Spiral or Deep Spiral. During the Misty the glider has to be open all the way, because even with a small tip collapse you loose too much energy. Just as you would exit like a normal Misty Flip release the brake completely when the glider is behind, push out the outside riser as much as you can (to keep the tension in the tip) and let the glider to shoot below at full speed. You will pass above the glider in Tumbling movement. If the first turn is completely clear and stable you can try to make another, but you may have to use rhythmic to perform it safely. If your technique is perfect you can build up the Tumbling to Infnity (Misty to Infinity).
Exit:
Lead it out as a Tumbling or Infinity.
Dangers!
All the bad things can happen…
Video:
Glider: APCO Twister
Note: Probably the first ever made Misty to Infinity.
It took few turns to reach the perfect angle by rhytmization.
Synchro Spiral
Description:
This spectacular manouvre was invented by the Safety Acro Team in 2000. Two pilots start to make Deep Spirals in front of each other, around the same turning center. As the spiral accelerate, the gliders approach, and it could be so strong that they may touch each other.
It’s a very dangerous manouvre. If the sensible according between the two pilots brake up, they can easily crash.
The extended version of the Synchro Spiral is the Synchro Ground Spiral, wherein the pilots continue spiraling down to the ground, and they end up in a Ground Spiral.
Helico Rodeo
Description:
One pilot is doing a stable Helicopter while another making a Spiral around him. It takes a lot of training for the one spiralling around to be able to keep always a constant distance and the same altitude with his partner (not to just flying an oval curve where he is coming close and then back far on the other side of the turn).
Molineti / Pitch pendulum synchro
Description:
This manouvre was invented by the Rodriguez brothers, Félix and Raul, in 2001.
Two pilots start to make big dolphines (pitches) next to each other and for opposite rhythm. While one goes up, the other one goes down and so on. Once there’s enough energy and height difference between the two pilots, they center themselves and continue the movement in line so they pass under/over each other. Of course, there’s a high risk of crashing, if the timing goes off.
SAT Rodeo
Description:
One pilot is doing a stable SAT while another making a Spiral around him. It takes a lot of training for the one spiralling around to be able to keep always a constant distance and the same altitude with his partner (not to just flying an oval curve where he is coming close and then back far on the other side of the turn).
Helico landing / Spin landing
Description:
Basically this is a quite simple but very spectacular trick. Actually this is a negative Spin, performed only few meters above the ground.
Basic technique
If your brakelines are long take a wrap on one side and sit out from your harness. In headwind, slow down the glider as much as possible according to the ground. Once you are stationary about 1-2 meters over the ground, release the left brake, grab the left riser and yank down the right brake immediatey at the same moment. The glider starts to spin and you’ll hit the ground in few seconds after about a 180 degrees turn. If you did everything well, the landing will be pretty smooth.
Advanced technique:
For more beautiful helico landings, you have to take some energy before.
For example: 1-2 meters high above the ground slow down the glider, than release the brakes and let it surge. You have to pass close to the ground (if you have enough speed you can even touch it with your harness, then you’ll climb back). When you are at the lowest point (or just a moment later) pull the brake to spin the glider. After it started to spin, release the brake, to keep the wing open, just like in a helicopter (it will also turning faster this way)! When you hit the ground, the canopy will be still in the air, so you have time to grab the „A” risers and pull it back over you. If your technique is right, the glider won’t even touch the ground!
Dangers!
Of course the biggest danger is if you hit the ground too hard, so I advise to practice only over a clean area, sand or snow and from low height (at most 1-2 meters) at the beginning! Anyway you don’t need more altitude to do it nicely! Don’t do this trick in strong or zero wind because you will hit the ground with a high horizontal speed and you can hurt yourself! Always use boots to protect your ankles!
Video:
Check the Wagas Festival video collection for more tips and tricks
SuperStall to Infinit
There has been rumours and speculations about this possible (or impossible?!) connection since the invention of the Infinite Tumbling by Raúl Rodriguez in 2004.
The SuperStall to Infinit is a radical connection from a Full Stall into a full power Infinite Tumbling. It was first successfully executed by Théo de Blic (FRA) on the 7th of October 2018 at Lake Garda but actually it was thanks to Russian pilot Egor Posokhin who inspired him to try following up on a Facebook challenge. Read the full interview with Théo about the birth of this connection here.
Video will follow.